hi everyone
i’m here with a super special blog post!
as you know i am a big lover of hand stitching on layouts, i mean what’s not to love about it? BUT i have a fantastic tip for you today.
i’ve played around with making stitched layouts and have used stencils which i draw through and then poke holes then stitch, also drawing around plates, die cuts etc – BUT i was getting frustrated with feeling like i was just using fairly basic shapes sooooooooooo i made it a mission to simplify it a bit.
here’s the exciting part (some of you may already know this………. you can turn any yes ANY silhouette shape, or cut file from any other source and turn it in to a shape with the holes already ready YAYYYYYY, how fabulous is that?
ok, so to do it it’s very simple:
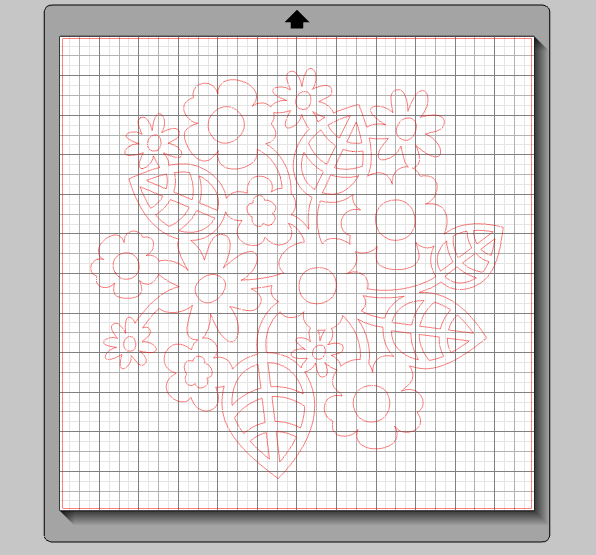
choose your image/cut file in the silhouette software and re size it to whatever you want it to be on your on screen mat, here is the design i chose
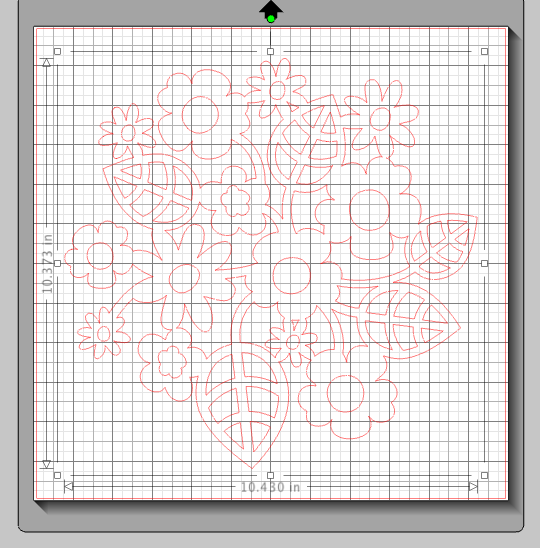
now most importantly click on it to highlight it this part is ESSENTIAL
click to send to your silhouette machine but you will need to change the settings on the right of the screen by clicking ADJUST CUT SETTINGS so as usual select the type of card/paper etc that you are using in the bottom section then in the middle section choose the third option down.
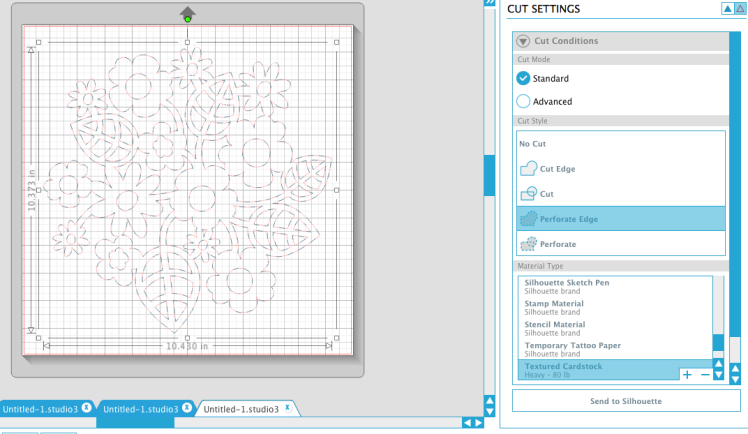
you will see that the image now looks kind of grey, when you see it on your screen it will have a dashed line look, don’t worry this is perfect – now the exciting bit – send to your silhouette YAY!
so it will run back and forth as usual and make it’s cut and then when it has finished you will see it has holes in for stitching. seriously how good is that??????
you will need to remember that too small a design will be very hard to stitch as you will tear your paper!
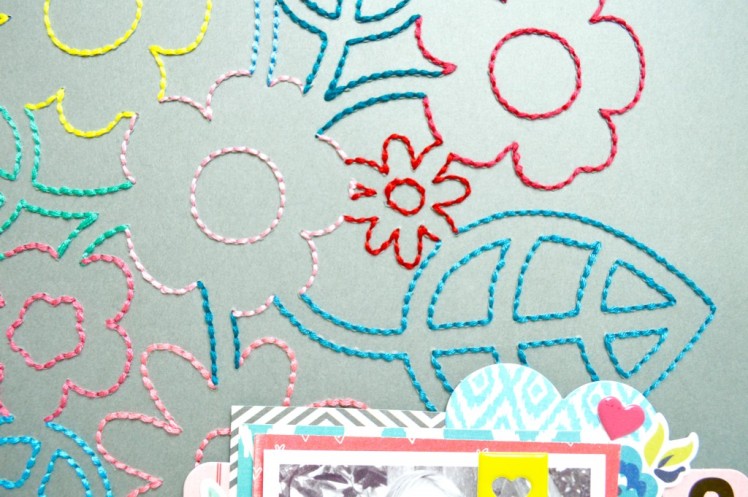
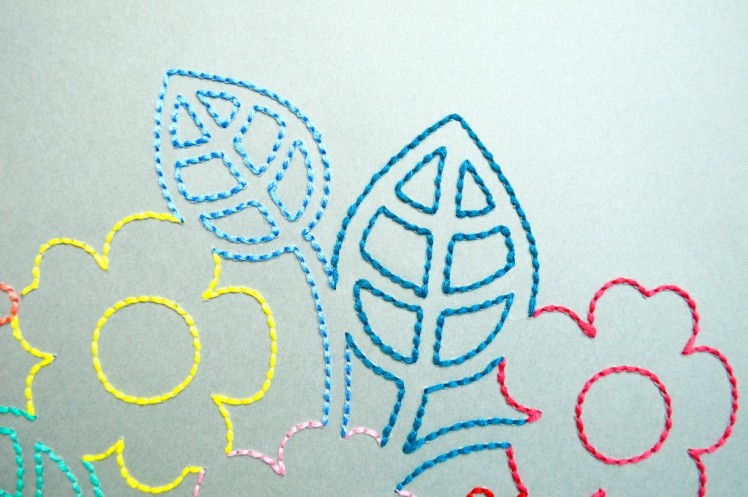
now here are some close ups of the layout i made – look how neat it can look:

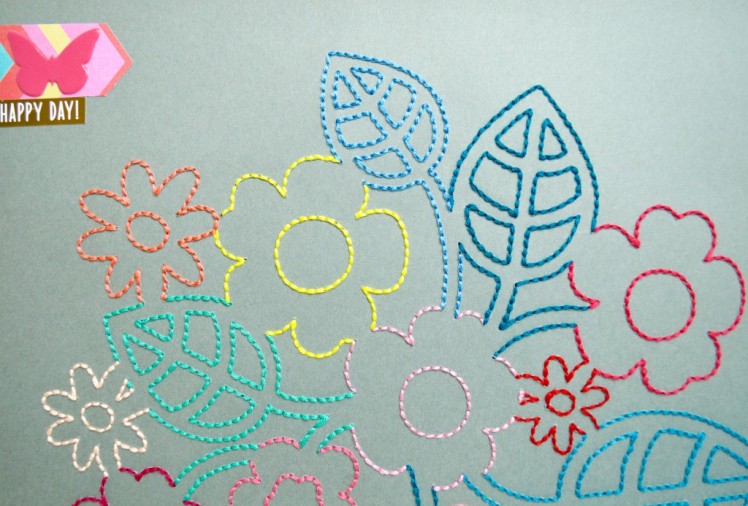

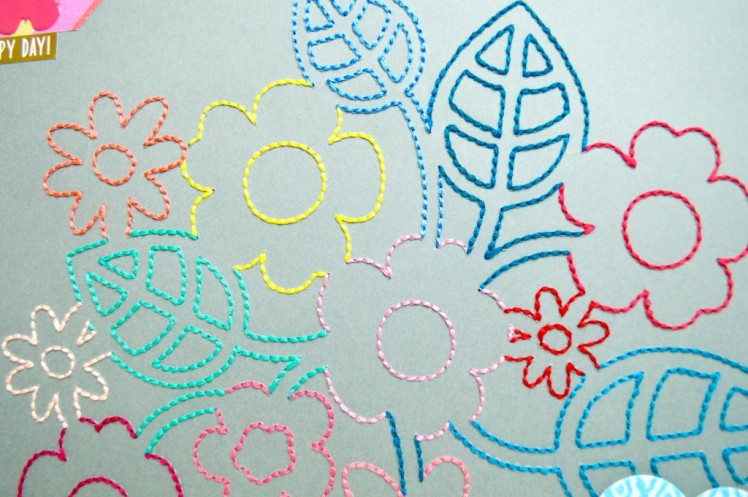

and here is the full page

i am so chuffed and happy to share this tip with everyone, please subscribe and leave a comment or any questions for me, i love to hear from you all.
’til next time
C x

What a fabulous discovery. I normally draw round things and poke holes for stitching too. Can’t wait to try this method instead. Thanks for sharing.
LikeLiked by 1 person
Thanks Amanda, I did too but this is so much easier AND you can use so many designs. Have fun!!!! C x
LikeLike
Oh My Goodness Caroline! What an amazing tip, thank you so much for sharing. I am always in awe of your stitched layouts and to find a foolproof way of being even more creative is just wonderful. You’re a star. xx
LikeLiked by 1 person
Yay Kerry, so glad you’ll find it useful. After playing around with stitching and coming across this I knew I had to share it! Have fun and let me know how you get on, C x
LikeLike
Can this be done on the cricut
LikeLiked by 1 person
Hi Michile, I haven’t got one so a friend had a look on hers and sadly she can’t find a way to do it on the cricut. GAH, sorry C x
LikeLike
Thank you so much I can’t wait to try this!!!😃
LikeLiked by 1 person
Hiiiiii yes have a go, it’s such a lovely way to while away the hours in front of the TV, have fun and let me know how you get on, C x
LikeLike
What a neat think to do,thank you for sharing with us
LikeLiked by 1 person
No problem – it’s full of possibilities. Have a ton of fun C x
LikeLike
What a great layout!! What is the name of this cut file?
LikeLiked by 1 person
Hi Jen, thank you, the cut file is called blossom cluster C x
LikeLike
Thank you for this awesome tip! For once I actually look forward to waking up early tomorrow morning and stitching my layout I just finished on my Silhouette! I am always in awe of all your pages and am a huge fan of your work! You do such an amazing job! Cant wait to see what my first stitched layout looks like. It’s about time I got in on the prettiness! 🙂
LikeLiked by 1 person
Ahhhhhh thank you so much Sarina, it’s such a great way to stitch neatly, the options are endless!!!! Tag me in a pic of your layout and above all, be patient and have fun HA! C x
LikeLike